


HOW TO SET UP YOUR BOARD
An easy guide to perfectly set up your brand new UDOO board
Discover
In this guide you’ll learn how to setup your board
Documentation
Need some information? Check our DOCS
Resources
Get everything you need for your UDOO Board
Projects
Unleash the versatility of UDOO boards
CHAPTER ONE
DOWNLOAD THE OPERATING SYSTEM
The main “Hard Drive” of UDOO QUAD/DUAL is the Micro SD Card. In order to get it started you just need to download the official UDOObuntu 2 Operating System and flash it into your Micro SD Card.
UDOObuntu 2.2.0 (Ubuntu 14.04 LTS)
Username: udooer
Password: udooer
SHA-1: 4f9a6097abd836497dc4e2ae41c5c167b96f4223
Release Date: April 12, 2018
Release notes
CHAPTER TWO
PREPARE YOUR MICRO SD CARD
we are going to show you how to create a bootable micro SD card for your UDOO with Windows 8, using an image file.
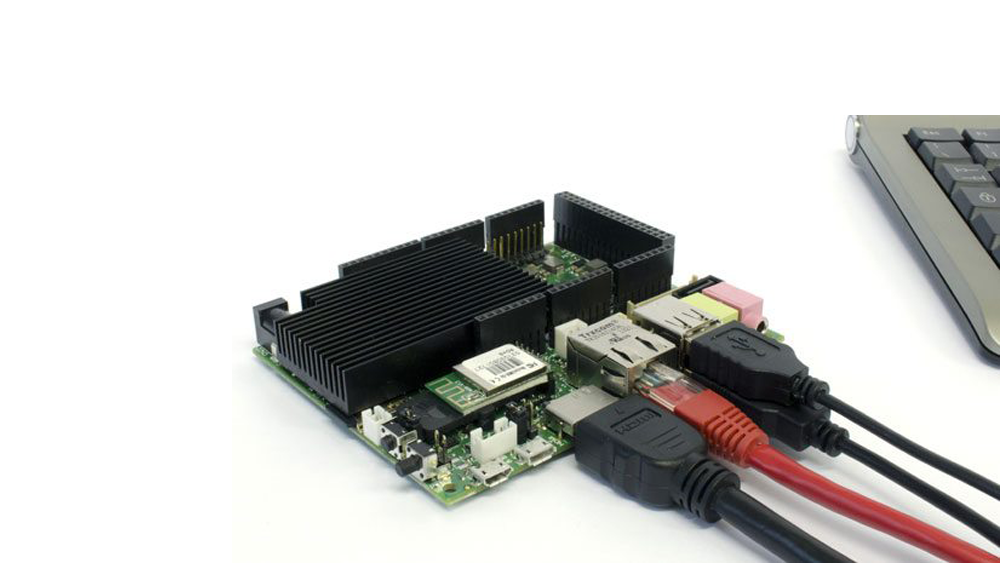
CHAPTER THREE
PREPARE AND CONNECT
- Insert your SD Card
- Plug Keyboard and Mouse
- Connect your monitor via HDMI (or LVDS, click here for the guide)
- Connect Microphone and Speakers (if any)
- Connect via Ethernet (if any)
- Turn UDOO on by plugging the Power Supply
CHAPTER FOUR
ENJOY YOUR BRAND NEW UDOO!
CHAPTER ONE
DOWNLOAD THE OPERATING SYSTEM
The main “Hard Drive” of UDOO QUAD/DUAL is the Micro SD Card. In order to get it started you just need to download the official UDOObuntu 2 Operating System and flash it into your Micro SD Card.
UDOObuntu 2.2.0 (Ubuntu 14.04 LTS)
Username: udooer
Password: udooer
SHA-1: 4f9a6097abd836497dc4e2ae 41c5c167b96f4223
Release Date: April 12, 2018
Release notes
CHAPTER TWO
PREPARE YOUR MICRO SD CARD
we are going to show you how to create a bootable micro SD card for your UDOO with Windows 8, using an image file.
Click here for the full guide for Windows.
Click here for the full guide for MAC OSX.
Click here for the full guide for Linux.
CHAPTER THREE
PREPARE AND CONNECT
- Insert your SD Card
- Plug Keyboard and Mouse
- Connect your monitor via HDMI (or LVDS, click here for the guide)
- Connect Microphone and Speakers (if any)
- Connect via Ethernet (if any)
- Turn UDOO on by plugging the Power Supply
